


Proof-of-Concept (POC) to Obtain Your Private and Free AI with LM Studio, HuggingFace, and PrivateGPT
In May 2024, it is entirely possible to run a powerful generative AI for free and locally on standard hardware, such as a MacBook Pro. This article guides you through setting up a Large Language Model (LLM) combined with a Retrieval-Augmented Generation (RAG) technique, demonstrating the current capabilities of these technologies. Please note that the aim of my guide is to help you set up a fully functional prototype, but the license limitations granted by the LM Studio team do not allow for enterprise or commercial use.
What is a LLM?
A LLM is a natural language processing (NLP) model that uses deep neural networks to understand and generate human text. Trained on vast datasets of textual information, these models perform various tasks such as translation, automatic writing, and question answering. You are likely familiar with tools like ChatGPT, Gemini, Claude, or Mistral. These models are powerful but often rely on paid online services and are not under your direct control.
What is RAG?
RAG combines text generation by language models with the retrieval of relevant information from a database or a set of documents. This approach enhances the accuracy of responses by accessing external information during generation. The key to this technique lies in vectorization, which transforms texts into numerical vectors. These vectors capture the semantic features of the text, enabling machine learning algorithms to effectively process and understand the texts.
Why deploy your AI locally?
Deploying an LLM locally means installing and running the language model on your own infrastructure, such as in my example here on a MacBook Pro, rather than relying on cloud services. The benefits include better data privacy, complete control over the model, and optimized performance based on the available local resources.
Technologies required for this POC
- A sufficiently powerful Apple MacBook, in my case I use a MacBook Pro M2 MAX with 32 GB of RAM.
- Homebrew for package management on macOS.
- The default Apple Terminal or iTerm2, which I particularly like for its rich functionality.
- Python 3.11 with Pyenv to manage multiple versions of Python without risking instability on your macOS.
- Poetry for Python dependency management.
- Make to automate tasks.
- LM Studio to run and serve LLMs locally downloaded from HuggingFace.
- The HuggingFace_Hub library to download “text embeddings” models.
- PrivateGPT to provide a dedicated graphical user interface (UI based on Gradio) and manage RAG locally.
Knowledge required for this POC
In terms of knowledge, no specific prerequisites, just familiarity with the command line, knowing how to use a text or code editor (like Vim, Nano, or VS Code), and some basic Git knowledge.
Installation of Components
When you read ‘bash’ in a code block, you need to open your terminal and type or copy/paste the code there.
Homebrew
Homebrew installs packages that macOS does not include by default. To install it, open your terminal and execute:
/bin/bash -c "$(curl -fsSL https://raw.githubusercontent.com/Homebrew/install/HEAD/install.sh)"iTerm2
iTerm2 offers more features than the default macOS terminal. Install it with Homebrew:
brew install --cask iterm2Python 3.11 et Pyenv
Check your Python version, in my case, I am using 3.11.9
python3 --versionUpdate if necessary. To update, if you are new to Python, it is highly likely that you have Python3 installed in /usr/bin/python3. To check, use the command:
which python3If you get /usr/bin/python3, it is the default installation. This environment is used by your macOS operating system, and I strongly advise against tampering with it!
So if your Python version is not at least 3.11, or if it is the one deployed by Apple on your system, you need to set up a new environment without altering the original one. For this, we will use Pyenv, which is very lightweight and allows you to manage multiple versions of Python according to your needs.
Let’s install Pyenv on your macOS with Homebrew:
brew install pyenvYou need to add Pyenv to your shell profile for it to initialize correctly. This will depend on your shell. In my case, I use Zsh with iTerm2. Throughout the rest of this article, I will only refer to this Bash environment except here, where I will detail how to configure several different environments (thanks to the Pyenv project team for detailing these operations so well!).
Configure your shell environment for Pyenv:
- For Bash:
echo 'export PYENV_ROOT="$HOME/.pyenv"' >> ~/.bashrc
echo 'command -v pyenv >/dev/null || export PATH="$PYENV_ROOT/bin:$PATH"' >> ~/.bashrc
echo 'eval "$(pyenv init -)"' >> ~/.bashrc
Next, if you have ~/.profile, ~/.bash_profile, or ~/.bash_login, add the commands there as well. If you don’t have any of these files, add them to ~/.profile.
- To add to
~/.profile:
echo 'export PYENV_ROOT="$HOME/.pyenv"' >> ~/.profile
echo 'command -v pyenv >/dev/null || export PATH="$PYENV_ROOT/bin:$PATH"' >> ~/.profile
echo 'eval "$(pyenv init -)"' >> ~/.profile- To add to
~/.bash_profile:
echo 'export PYENV_ROOT="$HOME/.pyenv"' >> ~/.bash_profile
echo '[[ -d $PYENV_ROOT/bin ]] && export PATH="$PYENV_ROOT/bin:$PATH"' >> ~/.bash_profile
echo 'eval "$(pyenv init -)"' >> ~/.bash_profile
Then reload your shell:
exec "$SHELL"- For Zsh:
echo 'export PYENV_ROOT="$HOME/.pyenv"' >> ~/.zshrc
echo '[[ -d $PYENV_ROOT/bin ]] && export PATH="$PYENV_ROOT/bin:$PATH"' >> ~/.zshrc
echo 'eval "$(pyenv init -)"' >> ~/.zshrc
If you want to obtain Pyenv in non-interactive login shells, also add the commands to ~/.zprofile or ~/.zlogin.
- For Fish shell:
If you have Fish 3.2.0 or later, run this interactively:
set -Ux PYENV_ROOT $HOME/.pyenv
fish_add_path $PYENV_ROOT/bin
Otherwise, run the snippet below:
set -Ux PYENV_ROOT $HOME/.pyenv
set -U fish_user_paths $PYENV_ROOT/bin $fish_user_paths
Now, add this to ~/.config/fish/config.fish:
pyenv init - | sourceeval “$(pyenv init -)” in .bash_profile, not in .bashrc. Otherwise, you might observe strange behaviors, like Pyenv entering an infinite loop.http_proxy and https_proxy.On macOS, you might also want to install AWS’s Q (formerly Fig), which provides alternative completions for many command-line tools with an IDE-like popup interface in the terminal window. (Note that their completions are independent of the Pyenv codebase, so they might be slightly out of sync.).
In any case, don’t forget to restart your shell for the PATH changes to take effect!
exec "$SHELL"More information on setting up Pyenv can be found here: https://github.com/pyenv/pyenv?tab=readme-ov-file#getting-pyenv
Poetry
Each of the following installation methods ensures that Poetry is installed in an isolated environment.) Furthermore, the isolated virtual environment in which Poetry is installed should not be activated to run Poetry commands. Install Poetry to manage Python dependencies:
curl -sSL https://install.python-poetry.org | python3 -Add Poetry to your PATH. In my case, it’s Zsh:
export PATH="~/.local/bin:~/.zshrc"Then, reload your shell profile with source:
source ~/.zshrc # # or the corresponding profile file for your bash, you got it ;)If you need to uninstall Poetry, then run the same command with the - -uninstall argument:
curl -sSL https://install.python-poetry.org | python3 --uninstallTest the proper functioning of Poetry:
poetry --versionYou should get something like:
Poetry (version 1.8.2)With the official installer as used here, you can manage updates with this command:
poetry self updateTo enable auto-completion in your terminal, follow the examples provided in the official documentation: https://python-poetry.org/docs/main/#installing-with-the-official-installer
If, like me, you use Zsh with the iTerm2 terminal, use the example for “Oh My Zsh”:
poetry completions zsh > ~/.oh-my-zsh/plugins/poetry/_poetryThen add the entry poetry in the plugins section of your ~/.zshrc file, which you can edit with Nano, Vi, or any text editor of your choice:
plugins=(poetry)If you already have other plugins, like git for example, then add poetry after the previous ones, separated by a space, which looks like this with the Git example:
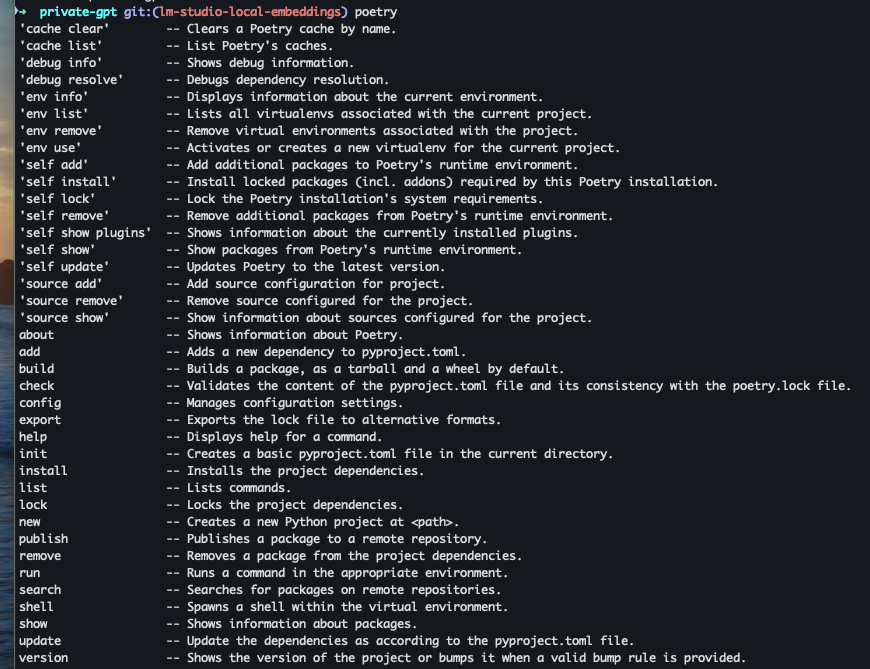
plugins=(git poetry)Then test the auto-completion by typing ‘poetry’ and then pressing the Tab key ⇥ on your keyboard. You should see the list of all available commands for poetry on the screen:
Make
GNU Make is a tool that controls the generation of executables and other non-source files of a program from the program’s source files.
Make acquires its knowledge of how to build the program from a file called a makefile, which lists each of the non-source files and how to calculate it from other files. A bit complicated? Basically, when you write a program, you need to write a makefile for it so that Make can be used to build and install the program. In our POC, Make is used to launch PrivateGPT, quite simply.
To install Make, we use Homebrew in the terminal again:
brew install makeWant to know more about this obscure utility? The official website of the GNU version of Make is here: https://www.gnu.org/software/make/
Installation of LM Studio
Here it’s very simple, just follow the instructions on the official website. We switch to “click mode”, it will be very easy :)
Official website fo LM Studio: https://lmstudio.ai/
At the time I created this documentation, we were at version 0.2.23, which has included the Llama 3 model from Meta AI since mid-April.
I would like to add that this version also provides the ability to generate “text embeddings” for the past few weeks, which is very useful for RAG applications like PrivateGPT. However, PrivateGPT does not yet support this, and your humble servant has not taken the time to code the necessary functionality. I might write a future article on this topic. In the meantime, we will use the Python library “huggingface_hub” to fulfill this function.
If everything is properly installed, you will already be able to play with a local generative AI on your Mac. Verify that everything is working and download at least the “Llama 3” LLM model from META. In my example, I used this one, which runs very well on my MacBook Pro M2 Max:
lmstudio-community/Meta-Llama-3–8B-Instruct-GGUF/Meta-Llama-3–8B-Instruct-Q8_0.gguf
To verify that the local server role of your LM Studio is functioning, after starting it, you can make a test request to check the loaded model. From your iTerm2 terminal or equivalent, type this command:
curl http://localhost:1234/v1/modelsYou should get a response similar to this (for the Llama 3 model):
{
  "data": [
    {
      "id": "lmstudio-community/Meta-Llama-3-8B-Instruct-GGUF/Meta-Llama-3-8B-Instruct-Q8_0.gguf",
      "object": "model",
      "owned_by": "organization-owner",
      "permission": [
        {}
      ]
    }
  ],
  "object": "list"
}
And if you look at the log window of your LM Studio server, you should see the same output there.
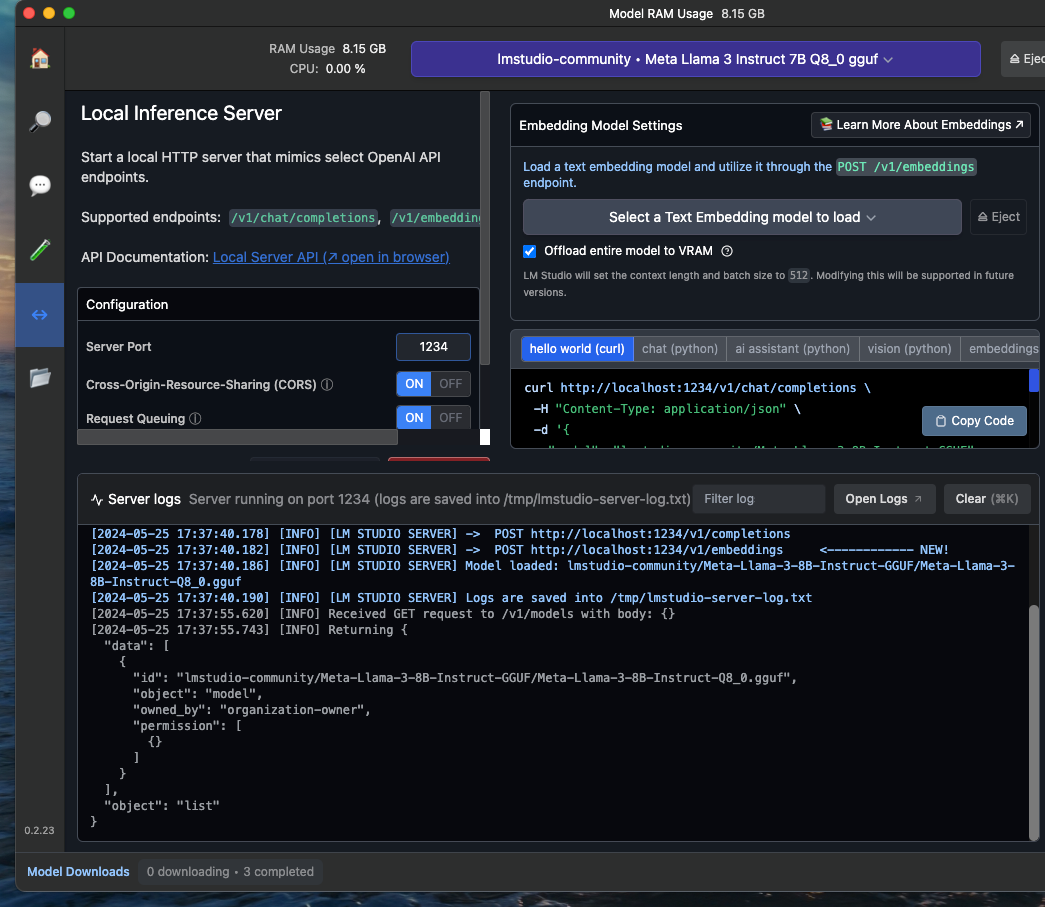
Note that you can also control LM Studio from the command line since version 0.2.22 from early May.
More information on the official website: https://lmstudio.ai/blog/lms
Installation of the HuggingFace Hub Library
You will need a free account with HuggingFace and have created at least one access token to connect from the HuggingFace Hub Python client to the HuggingFace repositories.
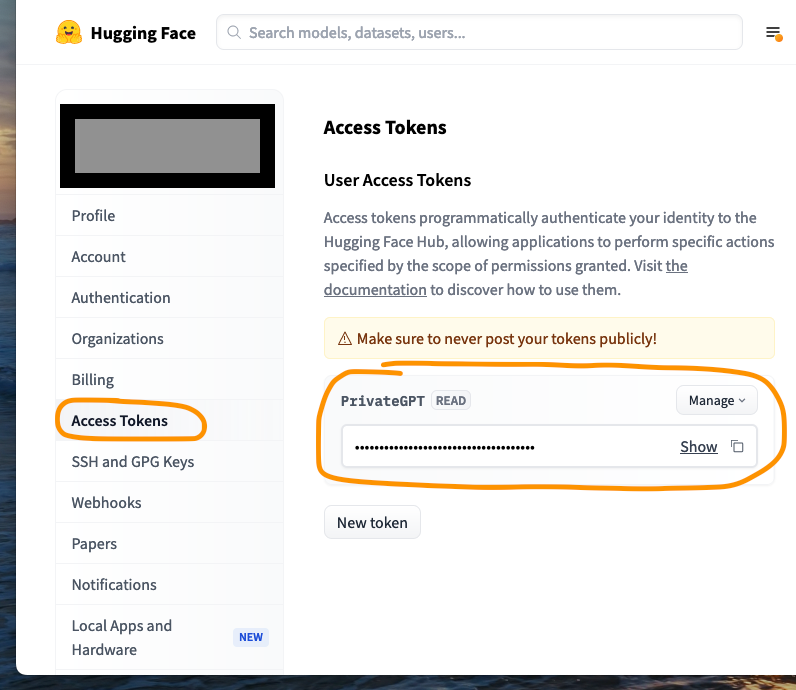
To do this, start by going to the HuggingFace website, create your account, then under “Settings” and “Access Tokens”, create and retrieve your token. This token is as valuable as a password, so handle it with care!
Official HuggingFace website: https://huggingface.co/welcome
Now on your Mac, in your terminal, install the HuggingFace Hub Python library using pip:
pip install huggingface_hub
huggingface-cli login
After running the second line, the library will ask you to provide your previously created access token. You can copy and paste it.
Installation of PrivateGPT
To learn more, before installing this program by cloning it from its GitHub repository, go here: https://docs.privategpt.dev/overview/welcome/introduction
To install it, always in your terminal, navigate to your development folder. In my case, I organize my experiments in a directory named DEV at the root of my home, which is ~/DEV
But by the way, do you know the tilde (~) symbol?
A quick side note for the freshly arrived newbies ;-)
The tilde (~) symbol in a Linux or macOS command prompt is used to represent the current user’s home directory. Here are some uses and meanings of the tilde in this context:
- Home Directory: When you see
~in a command prompt, it refers to the home directory of the logged-in user. For example, if your username is john,~will correspond to/home/johnon Linux or/Users/johnon macOS. - Quick Navigation: You can use
~to quickly move to your home directory. For example, the commandcd ~takes you directly to your home directory, no matter where you are in the file system. - Combining with Paths: You can use
~with relative paths to access subdirectories of your home directory. For example,~/Documentswill access the Documents folder in your home directory. - Other Users’ Directories: By using
~followed by a username, you can access another user’s home directory. For example,~johnwill access the home directory of the user john if you have the necessary permissions.
Here are some practical examples of using the tilde in a command prompt:
cd ~: Changes the current directory to the user’s home directory.ls ~: Lists the files and directories in the user’s home directory.cp ~/file.txt .: Copiesfile.txtfrom the home directory to the current directory.cd ~/Documents/Projects: Changes the current directory to the Projects subdirectory within the user’s Documents directory.
In summary: Wow, I write like a generative AI, is that serious, doctor? So, to reiterate, the tilde is a handy shortcut that simplifies and speeds up navigation in the file system by referring to the current user’s home directory.
So to install PrivateGPT, navigate to your development folder, for me it’s in ~/DEV.
Then clone the PrivateGPT repository and enter the newly created directory:
cd ~/DEV # please adapt to your developpment directory!
git clone https://github.com/imartinez/privateGPT.git
cd privateGPT
Installation of Poetry Dependencies Required for PrivateGPT
We will now install the additional dependencies necessary for this project to function. To do this, still in your terminal within your private-gpt project, use the following command:
poetry install --extras "ui llms-openai-like embeddings-huggingface vector-stores-qdrant"And you should see in your terminal the installation of all necessary packages for the project.
Here are some useful explanations about the arguments within the double quotes (quotes) in this command line:
uito use the Gradio UI.llms-openai-liketo connect to LM Studio, which is, as a reminder if needed, a local LLM whose server is compatible with the OpenAI API.embeddings-huggingfaceto be able to use Embeddings models locally in the Huggingface format, thanks to the huggingface_hub library. These models are used to convert words, phrases, or entire documents into vectors of numbers. These vectors capture semantic aspects of the text, allowing algorithms to work with text using mathematical operations. I will try to write an article later on what vectors are.vector-stores-qdrantfor storing the vectors created in the Qdrant format.
Configuring PrivateGPT
We will now modify the configuration file suited to our POC, namely the settings-vllm.yaml file that you should find at the root of your private-gpt directory.
Why this one and not another? Simply because it is the most suitable file, to date, for connecting to LM Studio. However, it is not fully compatible, as mentioned earlier, with the latest versions 0.2.19 and beyond, of LM Studio. It still lacks the components needed to utilize “text embeddings” for vectorization directly from LM Studio. I admit I haven’t delved too deeply into the subject yet.
To modify the configuration file, open the configuration file with Nano or from VS Code if it’s your preferred tool.
And if you’re not comfortable with either of these tools, there’s an easier way: open the file directly from macOS Finder in the macOS text editor, TextEdit.
nano settings-vllm.yamlThen modify the file to get this:
server:
  env_name: ${APP_ENV:vllm}

llm:
  mode: openailike
  max_new_tokens: 512
  tokenizer: mistralai/Mistral-7B-Instruct-v0.2
  temperature: 0.1

embedding:
  mode: huggingface
  ingest_mode: simple

huggingface:
  embedding_hf_model_name: BAAI/bge-small-en-v1.5

openai:
  api_base: http://localhost:1234/v1
  api_key: lm-studio
  model: lmstudio-community/Meta-Llama-3-8B-Instruct-GGUF
  request_timeout: 600.0
These are my settings, which work well for this POC, namely to demonstrate the power of a generative AI combined with a RAG to improve the LLM model used on your data (your files to be processed by the RAG), all locally on an “affordable” machine.
Of course, you can change the LLM models and text embeddings, test other values for temperature, or adjust the maximum number of tokens the LLM should use.
Prerequisites before the first launch of PrivateGPT to download the “text embeddings” model for your local RAG
This step is important because without it, the rest will not work!
You indeed need to download the necessary models locally for the RAG. Remember, PrivateGPT is currently not capable of using the new features of the LM Studio server. Therefore, we have installed a Python library from HuggingFace, connected this library to their repositories via a token that belongs to you, and now we need to specify what to download.
The procedure is as follows, while still in your terminal, in the private-gpt directory, use the following commands to customize PrivateGPT:
export PGPT_PROFILES=vllmThis command tells PrivateGPT to use the settings profile contained in your settings-vllm.yaml file.
You can verify that the command worked by using this:
echo $PGPT_PROFILESWhich should return this in your terminal:
vllmThen run this command, which will download the models, about 5 GB of data, into the subdirectory /private-gpt/models/:
poetry run python scripts/setupAnd if everything goes well, you will get the following output:
19:26:55.385 [INFO    ] private_gpt.settings.settings_loader - Starting application with profiles=['default', 'vllm']
Downloading embedding BAAI/bge-small-en-v1.5
Fetching 14 files: 100%|██████████████████████████████████████████████████████████████████████████████████████████████| 14/14 [00:00<00:00, 37.95it/s]
Embedding model downloaded!
Downloading LLM mistral-7b-instruct-v0.2.Q4_K_M.gguf
LLM model downloaded!
Downloading tokenizer mistralai/Mistral-7B-Instruct-v0.2
Tokenizer downloaded!
Setup done
Starting PrivateGPT
This is the big moment. If everything has gone well so far, there is no reason it shouldn’t work, suspense…
Still in your private-gpt directory, start PrivateGPT from the command line using make. Note that you will now always need to use this series of commands to start your PrivateGPT instance:
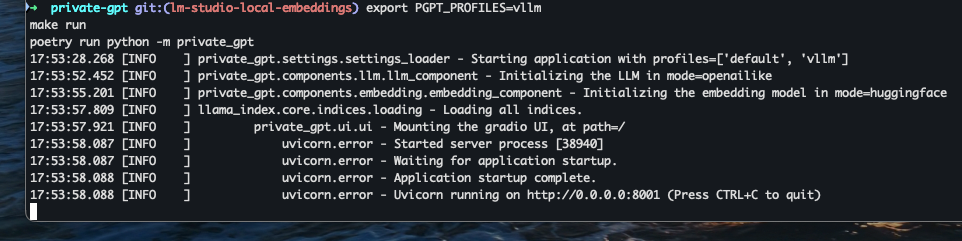
export PGPT_PROFILES=vllm
make run
And if everything is OK, you should get a series of lines indicating the successful startup of PrivateGPT and its Gradio UI available on localhost on TCP port 8001 (without SSL certificate):
Using the PrivateGPT Interface and Testing RAG
Connect via your preferred web browser to the address: http://localhost:8001/
You should see this:
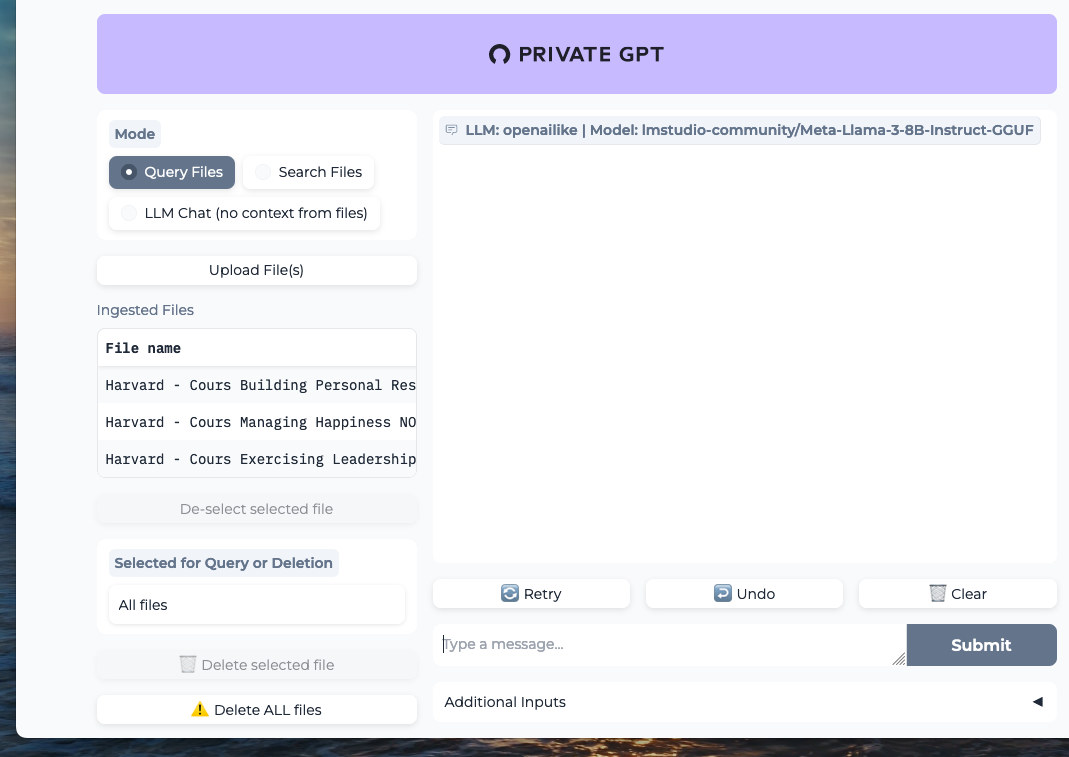
For my tests, I loaded into the RAG some notes from my leadership and mental health improvement courses, 3 PDF documents totaling about 30,000 words.
On the META Llama 3 model, without any fine-tuning, the results are impressive. While it’s not as fast as a ChatGPT 4o; on my machine, I get a finalized response in about a minute, but it’s free, private, and the quality of the response is quite relevant!
Have fun comparing queries with the context of your documents (Query Files button enabled) versus queries without the context (LLM Chat button enabled).
Next
I plan to present you with another prototype soon that will use only 100% open-source components, so no LM Studio but perhaps with Ollama (MIT license) or Jan (AGPL v3 license) instead, this time with a professional focus for use in business, with several dozen documents dedicated to a specific theme. Subscribe to be notified!