


POC for Obtaining Your Private and Free AI with Jan, HuggingFace, and PrivateGPT
This article follows up on my initial article regarding a similar deployment, but where the underlying technology for providing the LLM model on a localhost server did not meet my expectations in terms of licensing. The previous setup involved LM Studio, which has a highly restrictive proprietary license as of June 2024.
Here, we will create this POC using Jan, which is generously distributed under the AGPLv3 Open Source license. https://jan.ai/
I assume you have read my first article, at least for the theoretical explanations and the basic tools required to build this POC. If not, I strongly encourage you to do so unless you already possess the necessary skills in this area!
Technologies required for this POC
- Apple MacBook Pro M2 MAX platform with 32GB of RAM.
- Homebrew as the package manager for macOS.
- iTerm2 as the terminal.
- Python 3.11 with Pyenv to manage multiple versions of Python without risking the stability of the MacBook.
- Poetry as the package and dependency manager for Python.
- Make, a cross-platform tool to automate software compilation and installation.
- Jan, a newcomer that emerged in late 2023, follows a 100% Open Source approach with a purist license that I appreciate and, moreover, is free to run locally downloaded LLMs, all with a graphical interface. Jan will be our inference server instead of LM Studio used in my previous article. Jan is not developed “from scratch” but relies on various components also developed under Open Source licenses, including Llama.cpp, LangChain.js, TensorRT-LLM, TheBloke/GGUF, and Scalar. An interesting note about the philosophy shared by the developers of this project: Jan is inspired by “Calm Tech,” also known as “Calm Design.” “Calm Technology” or “Calm Design” refers to a technological design approach that fades into the background, minimizing interruptions and maximizing user tranquility by integrating harmoniously into their daily environment. I love it!
- HuggingFace_Hub, a Python library that will allow us to locally download the “text embeddings” model used. Maybe in the near future, we can do without this component if Jan and PrivateGPT integrate these features, let us see.
Knowledge required for this POC
As for prerequisites, there’s no need for extensive knowledge other than using the command line in a terminal, an editor like Vim or Nano within this terminal, or even VS Code (Visual Studio Code), which is free and very useful if you do a little or a lot of development. It’s a source code editor developed by Microsoft, designed to be lightweight yet powerful, offering a complete development experience for developers. Note that there are Free versions of VS Code, such as VSCodium.
And some basic Git knowledge, but again, just the minimum: knowing how to clone a repository, and I’ll provide the commands if this is new to you.
Oh, I’ll add a little linguistic note about a term that often comes up in AI, the word “inference.” The word “inference” generally refers to the process of drawing conclusions or predictions from available information. It’s a key term in logic, statistics, artificial intelligence, and linguistics, among other fields. In the context of local generative AI, the subject of our work here, inference specifically refers to using a pre-trained model to generate results (like text or images) from input data. So here, the inference server is Jan.
Let’s Get Started!
As mentioned earlier, I assume you can manage the basic tools required for PrivateGPT to function (Homebrew, Python, Pyenv, Poetry…) or that you have read my previous article.
Deployment of Components
For installing components other than Jan, I invite you to refer to my previous article, as it will be the same here.
If you have already deployed LM Studio, PrivateGPT, HuggingFace_Hub by following my article, then I suggest creating a new Git branch to test Jan. This is what I will present here:
Creating a New PrivateGPT Branch Dedicated to Jan
Navigate to your /private-gpt directory.
Ensure you are in your main branch “main”; your terminal should display: ➜ private-gpt git:(main) If not, switch to your main branch with the command:
git checkout mainCreate a new branch suitable for this project with Jan. In my case, I named it “jan-local-embeddings” to keep the logic of my previous article.
git checkout -b jan-local-embeddingsYou are now in your new functional branch, and your terminal indicates:
private-gpt git:(jan-local-embeddings)Update your Poetry environment if not done recently. As of the writing of this article, I am using version 1.8.3:
poetry self updateInstallation of Jan
Official site of Jan: https://jan.ai/
Download the file corresponding to your operating system. In my case, it’s the version for Apple Silicon (M1, M2, M3, and M4 processors).
Note that you can also install Jan with Homebrew, in which case the command is:
brew install --cask janAt the time of writing this documentation, the version was 0.5.0 released in early June.
By default, Jan installs in your home directory: ~/jan
If everything is installed correctly, you will already be able to play with a local generative AI on your Mac. Verify that everything works and download at least the LLM Llama 3 model to compare with the previous test under LM Studio. Then select this model before starting your first conversation.
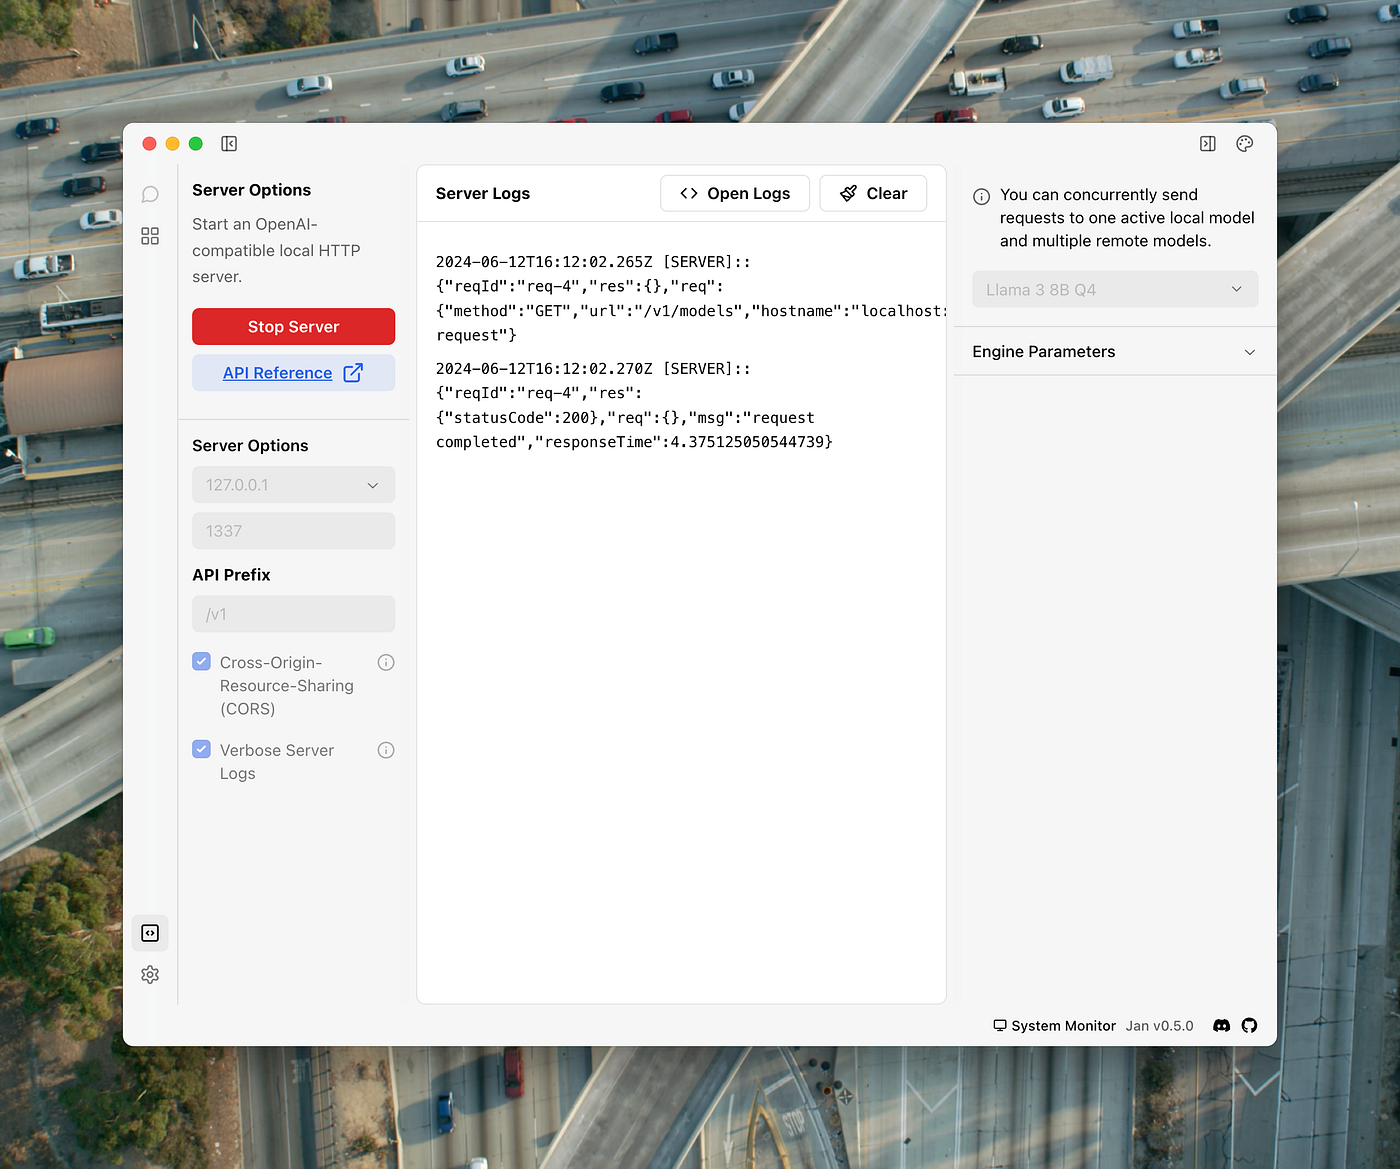
To verify that your LM Studio’s local server role works, after starting it via the icon at the bottom left, you can make a test request to know the loaded model. Note that with Jan, the default listening port is 1337. For a quick test, in the command line from your iTerm2 terminal or equivalent, type this command:
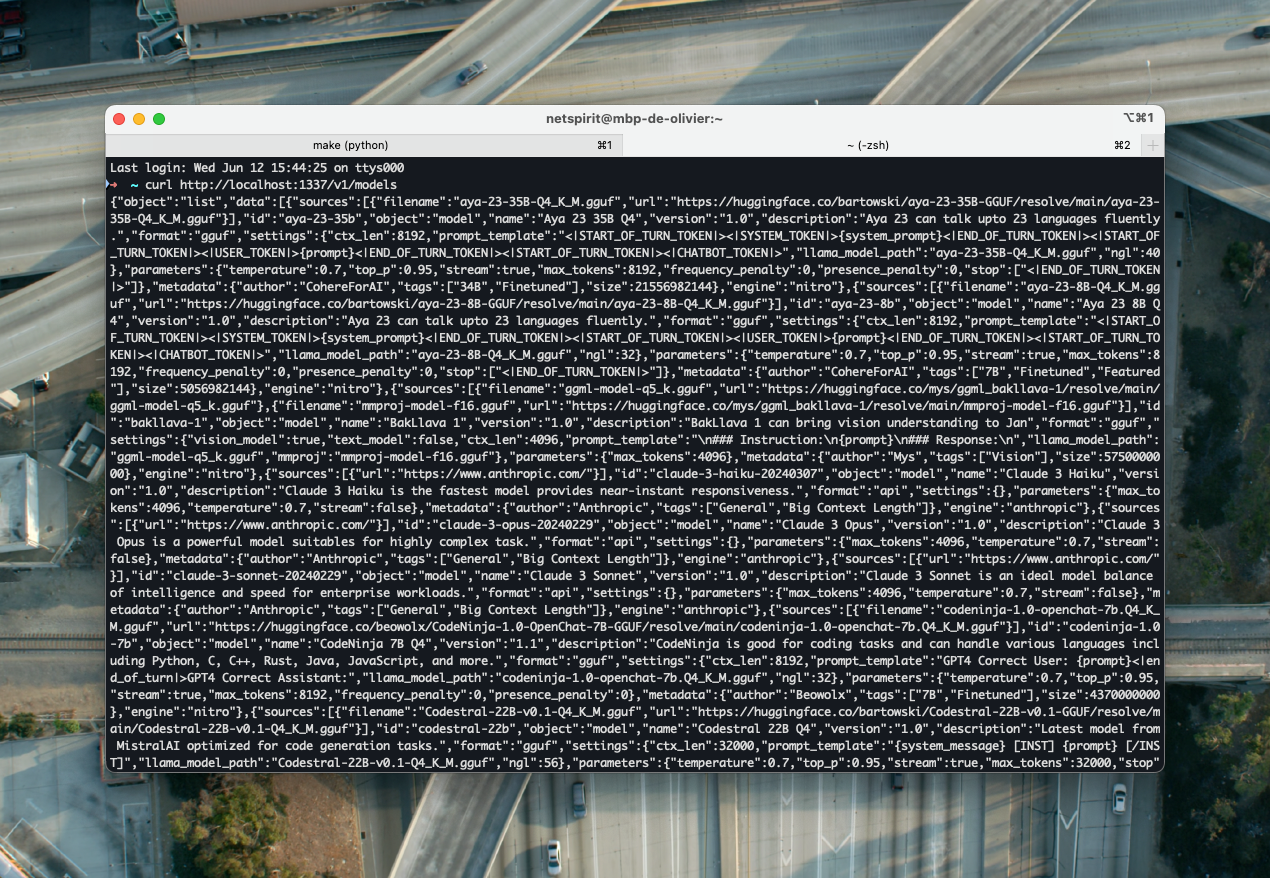
curl http://localhost:1337/v1/modelsYou should receive a response like this in Jan’s server logs (for the Llama 3 model):
And a much more verbose message in your terminal window :)
Configuring PrivateGPT
We will now modify the configuration file suited to our POC, namely the settings-vllm.yaml file found at the root of your private-gpt directory.
Why this one and not another? Simply because it is the best-suited file, to date, for connecting to Jan. Just like LM Studio, it still lacks the components to exploit “text embeddings” for vectorization directly from Jan.
To edit the file, in your terminal, I recommend using the nano editor:
server:
  env_name: ${APP_ENV:vllm}

llm:
  mode: openailike
  max_new_tokens: 512
  tokenizer: mistralai/Mistral-7B-Instruct-v0.2
  temperature: 0.1

embedding:
  mode: huggingface
  ingest_mode: simple

huggingface:
  embedding_hf_model_name: BAAI/bge-small-en-v1.5

openai:
  api_base: http://localhost:1337/v1
  api_key: EMPTY
  model: llama3-8b-instruct
  request_timeout: 600.0
These are my settings, which work well for this POC, to demonstrate the power of a generative AI associated with a RAG to refine the LLM model used on your data (your files to be processed by the RAG), all locally on an “affordable” machine. Here using fully Open Source tools, unlike LM Studio, the inference server used in my previous article.
Of course, you can change LLM and text embeddings models, test other values for temperature or the max number of tokens the LLM should use.
Starting PrivateGPT
The big moment: if everything has gone well so far, there’s no reason it shouldn’t work, suspense…
Always in your private-gpt directory, in the command line, start PrivateGPT with make. Note that you will now always need to use this series of commands to start your PrivateGPT instance:
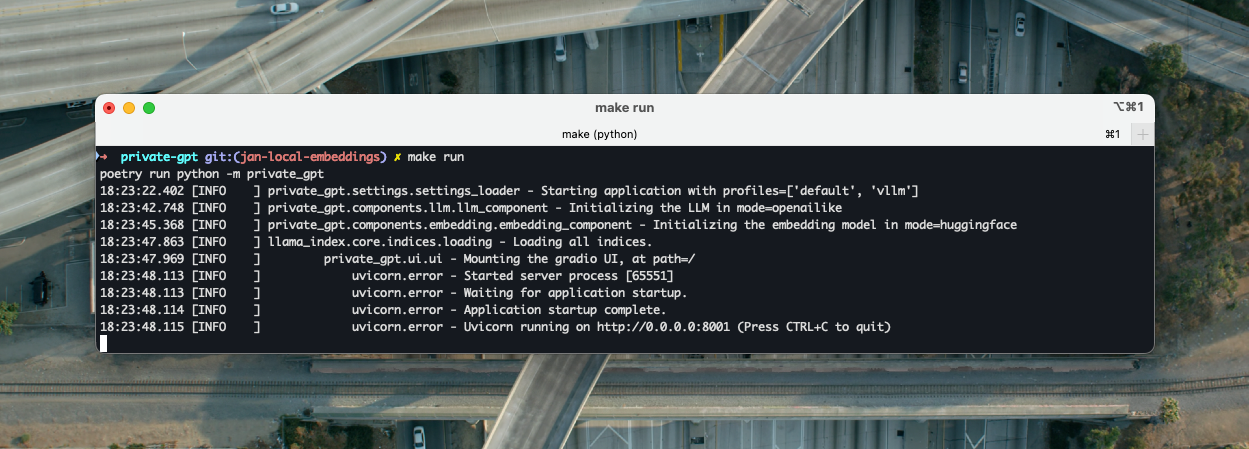
export PGPT_PROFILES=vllm
make run
If everything is OK, you should see a series of lines indicating the successful start of PrivateGPT and its Gradio UI graphical interface available on localhost on TCP port 8001 (without SSL certificate).
If it doesn’t work, I invite you, once again, to read and follow my previous article. Except for LM Studio and Jan, all other components and all the steps listed there are validated on macOS Sonoma 14.5 Silicon (M2).
Using the PrivateGPT Interface and Testing the RAG
Connect using your favorite web browser to http://localhost:8001 You should see this:
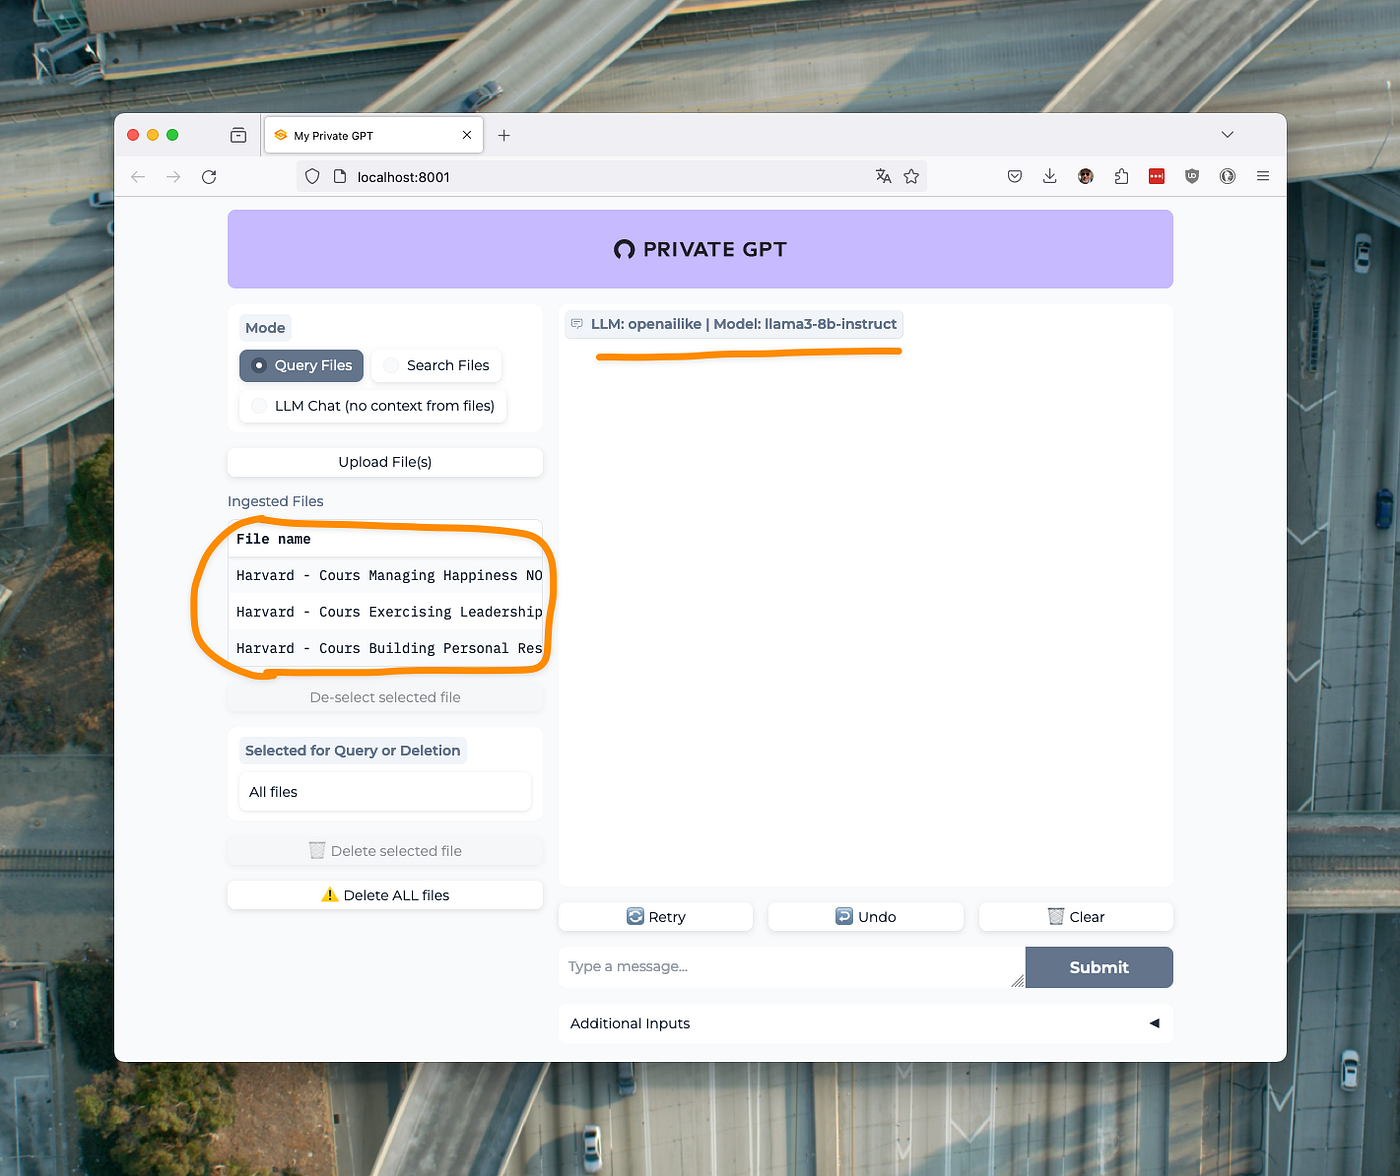
And since I am using the same instance as for my previous tests with LM Studio, I find my documents already ingested by my local PrivateGPT RAG here. Namely 3 PDF documents, lecture notes in French from some of my Harvard courses, totaling about 30,000 words.
On the META Llama 3 model, without any fine-tuning, the results are even more impressive than with my previous POC under LM Studio. This time I am as fast as a ChatGPT 4.o; on my machine, I get a finalized response in about 10 seconds, which is 6 to 7 times faster than LM Studio.
Enjoy comparing queries with the context of your documents (Query Files button enabled) versus queries without context (LLM Chat button enabled).
Next Steps
I plan to present another setup with Ollama (Open Source under the MIT license) soon, still using the same dataset to compare with LM Studio and Jan.